This week I've been preparing for Nick and Sachiyo's return from Japan and decided to make Japanese Milk Bread. This is the kind of bread they eat in Japan and it's very different from American bread. Nick sent me some lists to help get his house ready for them; one list was for groceries. He didn't have bread on his grocery list, but I decided to make some bread for them anyway - Japanese style, just to surprise them.

I first heard about Japanese Milk Bread here in Seattle when it started showing up at Farmer's Markets in 2017. Locally, it's made by Ayako & Family who sell over a dozen varieties of wild, heritage and heirloom plum jam and then they started selling the bread to go with their jam. People flocked to it! Nick and Sachiyo don't really eat that much bread but when we're in Japan, we do eat their bread which is a white, puffy-kind of bread. I never thought much of it but it's the only kind of bread you see in Japan. It reminded me of Wonder white bread only a lot larger and flat on top. But people here were buying up the Ayako & Family Japanese Milk Bread by the groves. Was I missing something? So, I decided to make it myself. I used a regular bread pan instead of a pullman loaf pan which I think is what they use in Japan to make it flat on top. If you don't have the lid to fit on top of the pan, then it will rise and have the bumps on top like mine did.

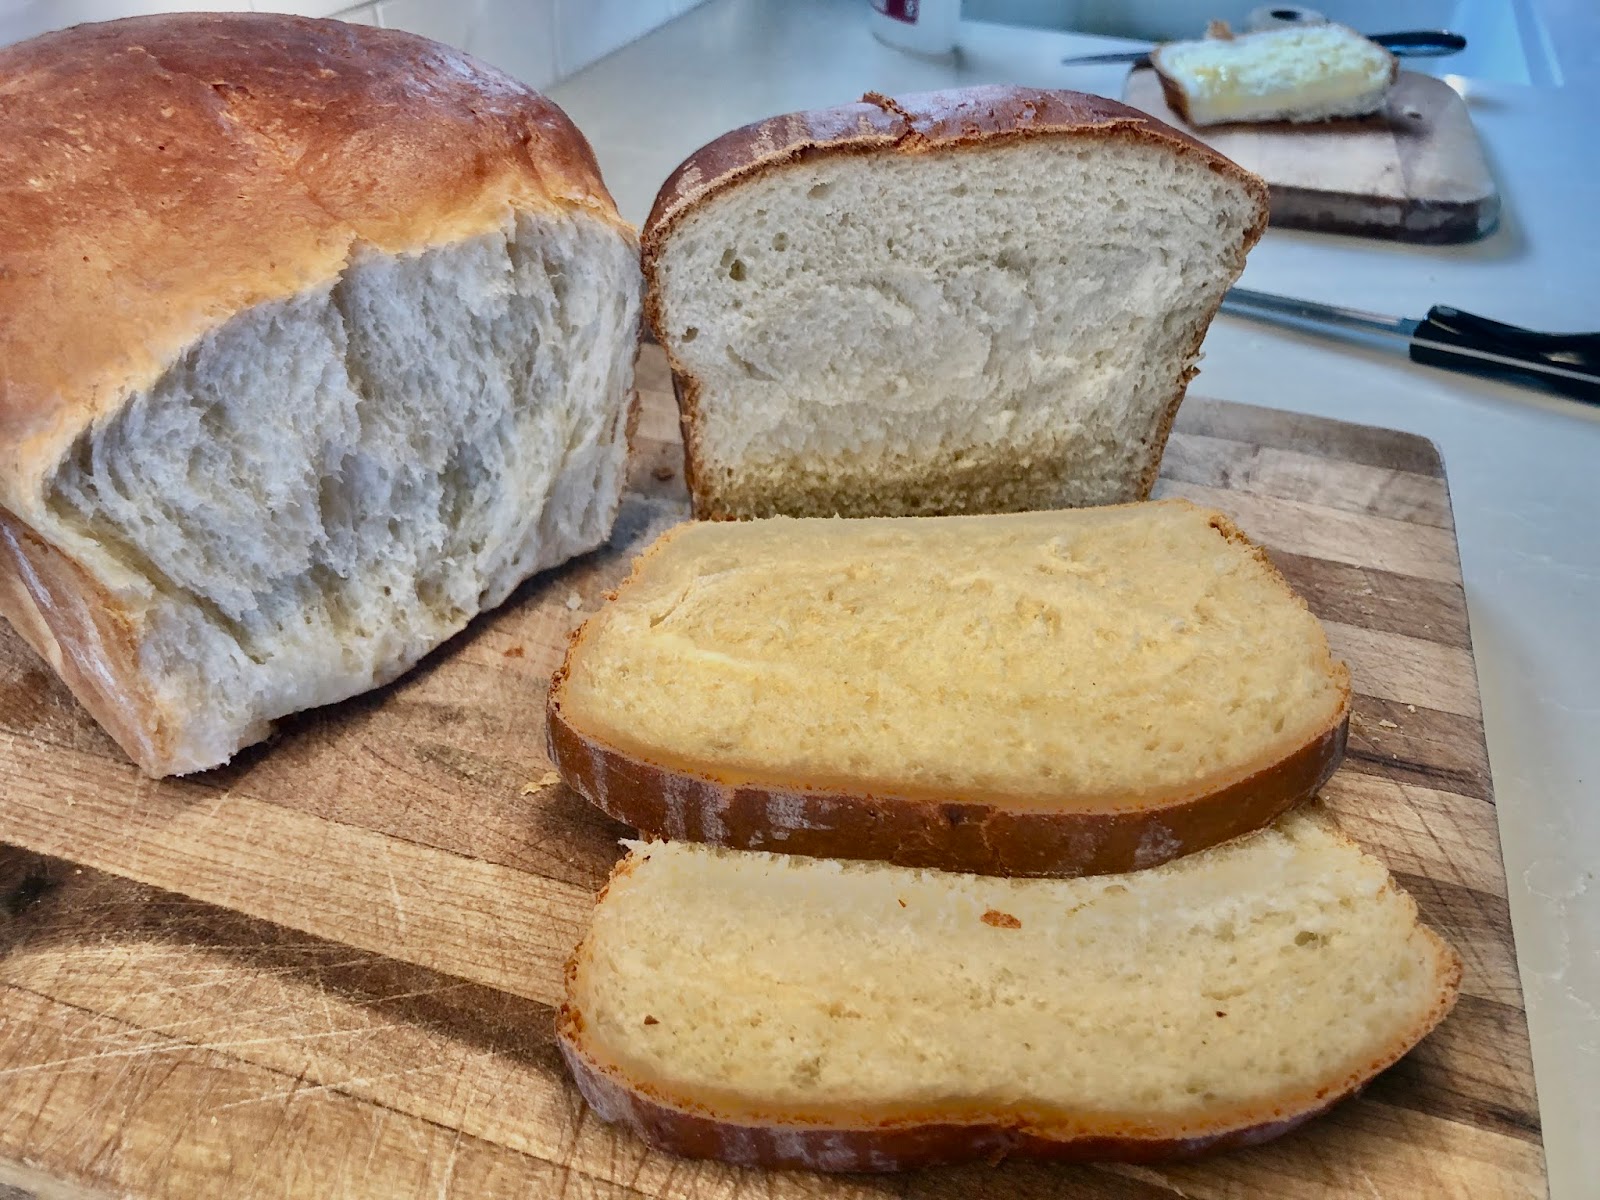
In America, Japanese Milk Bread is comparable to brioche bread - very buttery and flaky.

The bread is different than regular white bread because it is made with a roux but instead of using fat and flour, this roux, or what is called tangzhong, uses milk, water and flour. The moisture from the tangzhong makes the bread moist, light and fluffy and with a higher moisture content than regular bread. The water from the tangzhong makes more steam when the bread bakes, making more air bubbles producing a fluffier, taller loaf. This locks in water, allowing the bread to last longer that regular white bread and will stay moist and fluffy on your kitchen counter for days (although it won't last that long because you'll want to eat it immediately!) Bruce and I loved it. It's really great toasted for breakfast in the morning or for making peanut butter and jelly sandwiches or just having as a snack with butter and maybe some jam on top.

It has a faint sweetness to it but is so flavorful due to using milk as the liquid ingredient in the recipe making it a perfect everyday loaf of bread. It's much more distinctive in texture than your usual white bread and more feathery and cloud-like so very easy to pull apart where the different sections of the dough meet in the loaf after it is baked. I would make this bread again only make them into dinner rolls. Delicious! Or, I would make it into cinnamon bread which would be a perfect recipe for that, too. My recipe is for two loaves because this bread freezes well and if you make one, why not make two? I initially used the recipe from the New York Times but then looked at other recipes and adapted some changes from other people's tips and techniques. I really like how this one turned out. I initially made two loaves using two balls of dough in one pan but then I changed to four balls of dough for one loaf. I just like how it looks. You can pull it apart where the separate balls of dough meet and then you see how light and airy the bread actually is.

Like I said before, Nick and Sachiyo don't eat a lot of bread but I hope they are pleasantly surprised to find some Japanese Milk Bread at their house when they arrive on Saturday. And I can't wait to make it again and also try it as rolls or cinnamon bread.
Make 2 loaves
For the Starter:
1/3 cup bread flour
1/2 cup whole milk
For the dough:
5 cups bread flour
1/4 cup sugar
4 tsp. dry yeast (2 packets)
2 tsp. salt
2 eggs
1 cup warm whole milk
8 Tbsp. or one cube unsalted butter, cut into pieces and softened at room temperature, plus extra for buttering the bowl and pans
1. Make the starter: In a small heavy pot, whisk flour, milk and 1/2 cup water together until smooth.
1. Make the starter: In a small heavy pot, whisk flour, milk and 1/2 cup water together until smooth.

2. Bring to a simmer over medium-low heat and cook, stirring often, until thickened but still pourable, about 10 minutes (it will thicken more as it cools.) When it's ready, the spoon will leave tracks on the bottom of the pot.

3. Pour into a bowl and lightly cover the surface with plastic wrap. Set aside to cool to room temperature.
4. Make the dough: In the bowl of a stand mixer fitted with a dough hook, combine the flour, sugar, yeast and salt and mix for a few seconds, just until evenly combined.


5. Add egg, milk, and starter. Turn the mixer on low speed and knead for 5 minutes.

6. Add the soft butter, increase the mixer speed to medium-high and knead another 10 to 12 minutes (it will take a few minutes for the butter to be incorporated), until the dough is smooth and springy with just a bit tacky.


7. This dough is very sticky and moist so after it is done in the mixer, I kneaded by hand on a floured surface for a few minutes until the dough was less sticky and more smooth. It may require extra flour added to it which is O.K. to do. It is ready when it is no longer sticky and makes for a nice, smooth round dough with visible bubbles under the surface.

8. Lightly butter the inside of a bowl and place the rounded ball of dough in the prepared bowl. Cover with a kitchen towel and let rise in a warm place until doubled in size, 40 to 60 minutes.

9. Punch the dough down and scoop it out onto a surface. Using a bench scraper or a large knife, cut dough in half.

10. These are your two loaves. Take each half and cut again into 4 balls.

11. Cover again and let rise 15 minutes.
12. Generously butter a 9-by-5-inch loaf pan.
13. Using a rolling pin, gently roll out one dough ball into a thick oval of about 12 inches long and 6 inches across. (You may use a little bit of flour on the surface and rolling pin to keep from sticking.)
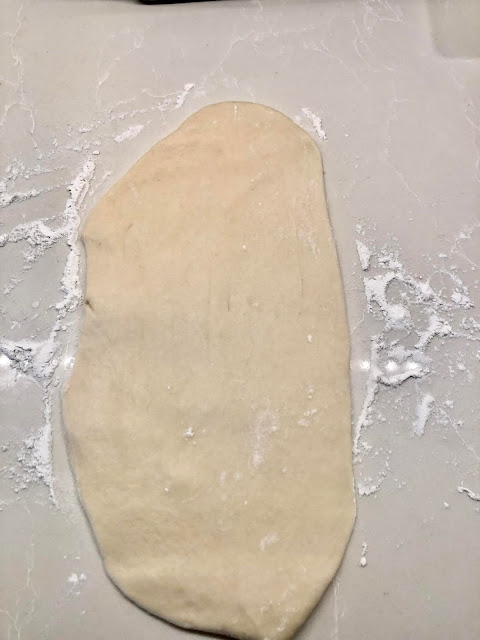

15. Gently roll up the piece of dough as you would a cinnamon roll.

16. Place the roll of dough in the buttered bread pan, seam side down and crosswise, nestling it near one end of the pan.

17. Repeat with the other pieces of dough.


19. Preheat oven to 350 degree F. Brush with an egg wash of 1 egg + 1 Tbsp. milk beaten together.

20. Bake on the bottom shelf of the oven until golden brown and puffed, about 30 minutes. You may cover with foil halfway through the baking if the tops begin to get too dark.
21. Let bread cool in the pans 10 minutes, then remove to a wire rack and let cool at least an hour.

Enjoy your Japanese Milk Bread.
Comments
Post a Comment